Losing Weight, Power Kiting, Stunt Kites

Gone with the Wind

Hi There and welcome back.

On a week when I don’t seem to have made much forward progress on the diet – (and lets face it they sometimes happen),  I thought I’d let you know about a surprising way of exercising that you may not be aware of and might like.

Remember back when you had a kite and mum and dad got you to run up and down to make it stay in the air?

Well this is kind of like that but a little more sophisticated.  This blog and the next one talk about stunt and power kites and how they can help you lose weight.

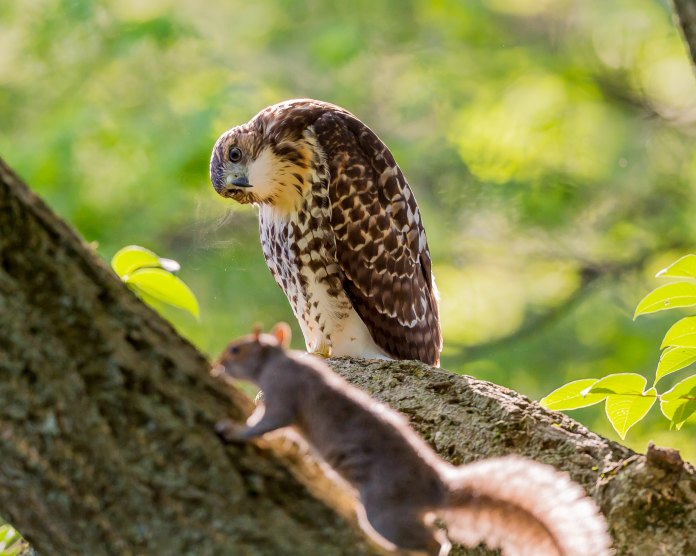
Just to get one thing out the way for those with twitcher inclinations – we’re not talking about this handsome fella, or the squirrel he’s somewhat curious about:

david-morris-176542

unsplash-logoDavid Morris

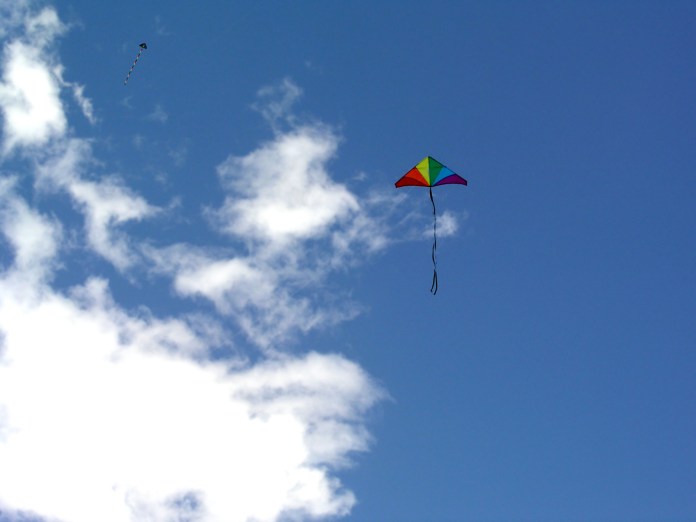
You’re probably familiar with holiday kites – they cost about £5, have a distorted diamond shape, a set of strings on each edge and one long string that you fly it with, or more accurately that you stop it disappearing with.

single-line-kite-skylark-1-1473946-639x852

To keep these aloft, you need a strong wind, or to keep walking/running with it.  I remember that after about 20 minutes this loses its appeal.

This is a stunt kite.  These are a little more sophisticated.

kite-2-1411319-1280x960

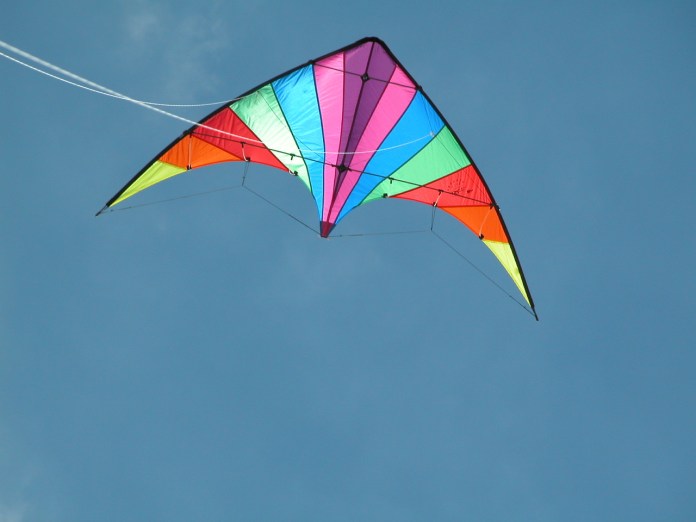
They cost from £60 and you can do tricks with these – turn them in circles in the sky, get them to fall towards the earth at a great rate of knots and then just before plummeting to the ground pick them up sharply and fire them off back in to the sky again, get them to stall and recover them, and walk dogs – they love chasing them.

They take a surprising amount of effort to hold, and the stronger the wind is, the more effort is needed.  They also take a little while to set up.  Simply put they have two strings connected one on each side of the kite, that are eventually used to control the kite in the air.  That’s right – with this type of kite you are in control, not the kite as is usually the case with the one string type at the top of the page.

Ok, so back to setup.  You have to walk out in to the centre of a large open area (hopefully not with traffic or aircraft landing – a park or the beach would be ideal (and safer).

Once there, you unpack the stunt kite, facing backwards and upside down, connect the strings (they’re actually very high tensile load dyneema these days not string but I won’t get into that) to the kite, and then you put a handy rock or can of coke or something on the kite and walk backwards into wind with the strings until they’re all wound out.

Then you expertly (ok not at first but if you take this up you’ll become expert quite quickly) tug on the lines and the kite will launch into the air, and you’ll be getting upper arm, back and quad exercise whilst pulling back on the kite, just like this fella here.

kite-flyer-1431372-1278x707

That is not the only way you’ve benefited.  You had to walk out to the centre of the field and then walk the strings out – doesn’t sound like much but its walking exercise, and if like I did, you spend half your time walking back to the kite to get it ready to launch again, and then back out again to launch it, you’ll find yourself covering a lot of ground, and while the kites in the air having fun and relaxing too.

two-kites-1484668-1280x960

When you’ve had a few goes, you’ll find there’s something quite marvellous about using the power of nature to transform what was just canvas and poles in a bag, into something quite majestic in the air.

So, the basics are:

  • Buy a stunt kite.
  • Find a safe open area where kite flying is allowed (you’ll see notices if it isn’t).
  • Wait for a reasonably windy, rain free day.
  • Pop out in to the centre of the field with your kite.
  • Assemble it, and put something on it so it won’t blow away (until you want it to).
  • Walk out the lines.
  • Tug on the lines and fly the kite.

There is a little more to it, but not enough to prevent you trying it out, and seeing if you like it.

Please don’t try to fly a kite in weather that looks like it might turn stormy – apart from the risk of getting soaked, its pretty dangerous (kites are earthed lightning conductors in bad weather).

Also if there’s horses about drop your kite – kites spook horses because of their similarity (as far as the horse is determined) to birds of prey.

If you’re not too sure about trying this out on your own, or just want to see how its done first, there are kite flying organisations which hold regular events and will no doubt warmly welcome you along.

In the UK: The Kite Society of Britain
In the USA: American KiteFliers Association

Next time, part two covers kites which will really give you a workout, e.g.

follow-your-kite-1436481-640x960

These have four lines not two, cost from £150, will easily pick you and a board up, happily tow a buggy with you steering at 40 mph, and can do all the tricks of the stunt kite and more.  If you’re using them properly they need safety gear. (Ironically this flyer isn’t using a helmet or armoured jacket – I don’t fly my power kite without them).

Holding one of these things where you want it isn’t easy and uses a lot of calories which is a big plus when you’re dieting and want to have fun.

Hopefully this has whetted your appetite to find out more, and at least try a stunt kite out.

For those who are suppressing yawns and prefer feathered kites, I’m sure you’ll appreciate this fella who would find all this string and canvas very amateur hour, and I wouldn’t blame him:

soar-1361161-1279x803

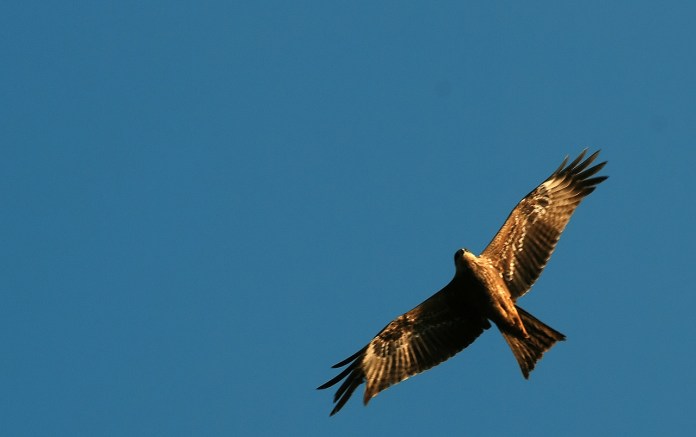
For a fleeting moment, a few years ago a kite I was flying attracted a bird of prey.  He nobly shared what was probably 20 seconds formating with my kite and then departed for tea.  Not something as a kite flyer you forget easily.

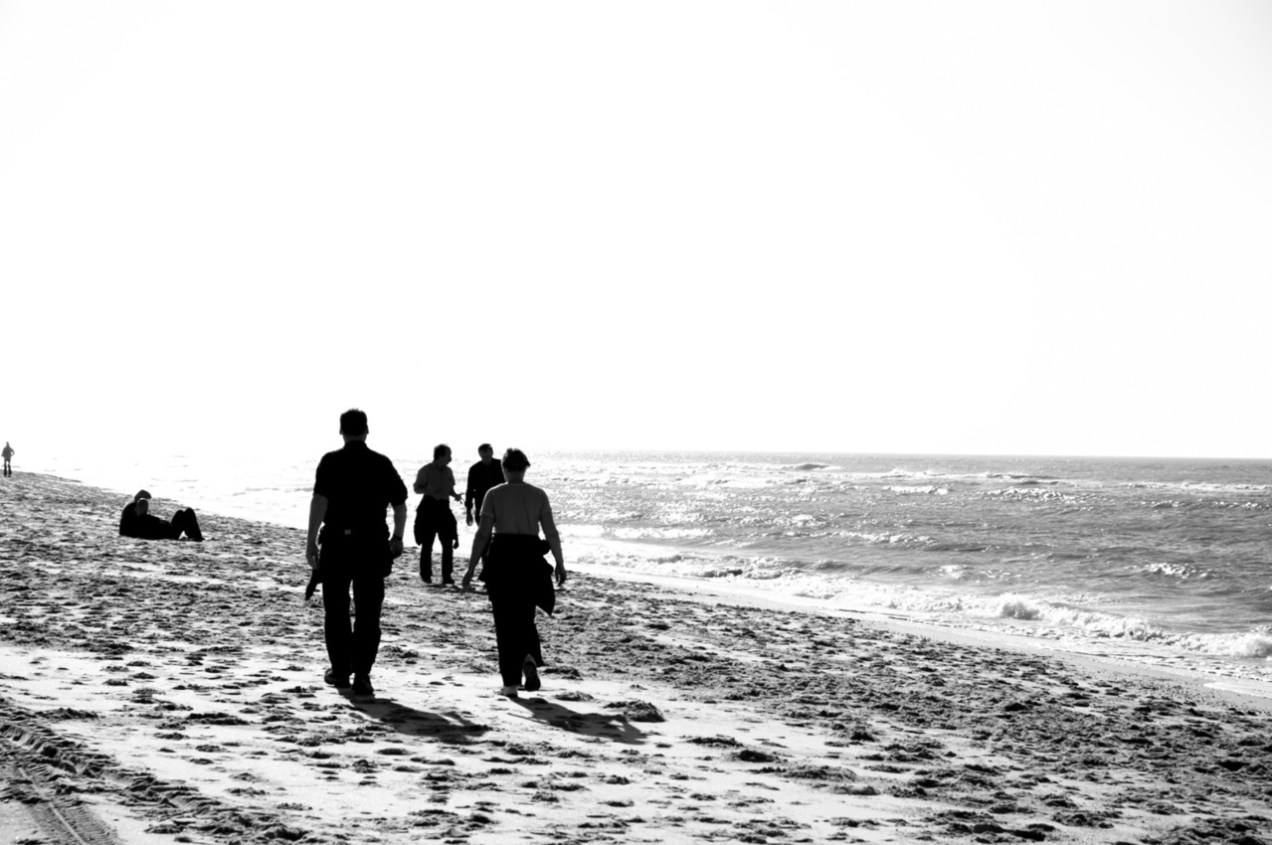
If you’ve found this article interesting please click Like or Follow, and this will be seen by more people.  The lead image is from Enrapture Media on Unsplash .

Thank you for reading and catch you next time.

All the best.  Ian.

Standard
How to start exercising, Sportives

Proof of your accomplishments

Hi and welcome back!

This article shows how to use Strava to measure your cycling activity, how to find cycling clubs and places to cycle, and lastly Sportives – what they are, why you should try them, how you enter and what they’re like to take part in.

Strava

Strava is a GPS based measurement app used to record cycling and running activity, and I wouldn’t think of not using this app when I’m cycling now. The orange themed app is downloadable on Android and at Apple’s App Store.  The following images have kindly been provided by the Strava app on phone or on their site.

Once you’ve installed the app and registered for free, launching it displays your dashboard.

strava dashboard

URL for Strava Dashboard

This is where you can start what they call a feed, to register distance and direction in figures and map display.   This auto pauses if you stop your bike and restarts once you get going again.  You have to stop it though, at which time you can decide whether to sync and save the run.

strava trip 2

Initial Strava screen

Once recorded and synced with your account you can review your miles online at https://www.strava.com/dashboard .

Strava detail 1

Strava Dashboard

Its a lot easier to use and review progress on Strava if you get a mount for it.  I use one from Topeak.

photo of topeak phone mount on stem of racing bike

Topeak Mobile Phone Mount

If you set your phone to permanent display, you’ll have a readout that’s on all the time.  It consumes 30% of battery power over an hour on my iphone – just check that you’re charged up before you mount it, or if you’re out for a while, connect up your battery pack.

Strava allows you to see sections of road on your runs, and your relative performance against other people using Strava who have navigated the same stretch of road, giving you a ranking (mine as you’ll see is miles down the list).

Strava detail 3

It also gives you metrics on height, speed and power during a run, which is useful if you want to see your relative performance on different elevations.

Strava detail 4

There is much more to Strava including a video they send you annually of your achievements throughout the year, and premium contracted services offer a further tier of services for those who take cycling seriously.

Cycling Clubs

The fastest way of finding cycling clubs in your area is  to use the internet.  Three useful sites are Meetup, British Cycling and Cycling UK.

Meetup is an online organising tool for people with similar interests and was founded in 2002 by Scott Heiferman, Matt Meeker and Brendan McGovern as a direct response to the 9/11 attacks, in order to bring people closer together.  You can search for cycling clubs in a radius from a given town, and hotspots to local clubs allow you to see their meetup pages, e.g.

meetup 1

Image kindly provided by Meetup.

British Cycling was mentioned in the last article and besides its wealth of information on cycling in general, it allows you to pinpoint clubs and cycling events near you.

Cycling UK also dedicates part of its site to finding and joining clubs in your area.

Sportives

So you’ve put in all the cycling miles to lose weight.  If you want to have a go at a non competitive race to see how you’d do over a longer distance against the clock, perhaps you’d like to try a sportive? Want some visible proof of your accomplishments? Read on.

I suspect you’re wondering why its a race if it’s not competitive? Technically its not a race but get yourself in amongst hundreds of riders and its difficult to resist the competitive spirit, even if there aren’t prizes or ranking position points which are the requirements for an official competitive race.  They actually contain 2 or 3 separate ‘races’; short routes of around 25 miles, one for 50 miles plus and a longer one of 75  miles plus.

Sportives do allow you to meet other riders, tackle distance you may not have had time to do before, have a ride out with a large number of riders, and provides freebies for entering.  Normally you’re presented with a medal, and free products from companies using the race for marketing.  Sometimes t-shirts, bandanas or socks are given away.  Most sportives cost from £25, depending on distance, and results are displayed after the race on the organiser’s website.  There are normally photographers on the course taking snapshots of every rider which you can buy online a couple of days after the event.

I’ve competed in six sportives throughout the South East in the Wiggle series, but this isn’t the only series.  The text following describes prep and race on one of Wiggle’s runs.

Entry is online, and they’ll add you to their list of riders for the event and send you confirmation of entry details, including route.

Preparation

I prepare the night before as its usually an early start, and if the race is some distance from you you’ll obviously need to take this into account when determining time to set off in the morning.

I usually check the bike over; tyres, drive train, lights etc, and then because I’ve got a small car, remove the wheels and pack the bike so its one less thing to do first thing.

I also check the weather forecast on the BBC to see what it’s sensible wearing first thing.

Packing List

  • Printed entry confirmation and route map.
  • A spare tube or two and rim removal tools.
  • A mini pump.
  • Waterproofs that are small enough that you can carry them with you.  Legs are not as important as upper body so if you’re packing only one take the top.
  • A thermos for coffee/tea. (Race organisers do have catering at the race but its normally a distance from the car park).
  • Headgear.  (This must have a US Snell B90/B95 or European standard CE test label).
  • Portable USB charger (for lights and phone should they run low).
    Water bottle(s).  If you can take two do so.  Better to need water and have it than the other way round.
  • Dry clothing including socks (for when you finish).  (Drive to the event in your race gear).

On the day

Plan to leave contingency time for bad traffic.  You can start the ride after the start time periods (there are different ranges of time for each of the rides) but if you finish the race after the organisers have packed up their marshal stations, you won’t have an official finish time or be able to collect a goodies pack.

When you get closer to the race, you’ll see signposts for car parking.  Once you’ve parked up, leave the bike where it is, pick up your headgear and go and register.  You’ve entered, but the organisers will need to tick you off on their lists and slap a self adhesive transponder sticker with your race number barcode for their tracking mechanisms on your headgear.  If you enter late, you may not be on their list.  If this is the case, go to their ‘on the day’ race entrance table, and they’ll issue your headgear barcode.

With some races, dependent on whether you entered weeks in advance or signed up for particular deals, they’ll also give you whatever you’ve also bought or become eligible for, e.g. water bottles, energy bar packs.

Once you’ve registered, the time is yours to use as you wish before the race, remembering to leave enough time to get your bike assembled, your riding gear on and race number attached.  Organisers usually have bike gear and clothing stalls on site, and there’s catering of some sort if you’ve not had breakfast.

The Race

Join the other riders at the start line, listen to the race safety briefing, set Strava on if you’re using it, and you’re off!

20170408_102038

If its a longer distance than you normally cover, its best to pace at the start, and adjust your speed depending how you feel after a mile or two.  Its not a race but they’ll be riders who are moving at a fair rate to beat personal times (or friends).

Depending on the length of race you’ve selected they’ll be a number of refreshment stations where you’ll get free drink and energy food, and facilities if you need them.

If you’re calorie counting and its food that isn’t packaged, you can note down roughly what calories these are.  If you have a diet app, this makes this easier.  Personally, I figure that its unlikely I’ll break my diet limit as the 30 mile races I enter use about 750 calories, so I don’t usually count on race days.  It does give you a bit more freedom about what you can sensibly eat before and during the race.

Race Etiquette

  • Its normal to overtake on the right and warn people if there trajectory looks like you might collide.
  • If you can, on less busy roads, warn other grouped up riders ahead of you if there’s a car coming.
  • Ride singly where you can.  A fair proportion of the race will be on normal roads.  I find that riders double up on narrow double white line stretches because it forces traffic to overtake sensibly.
  • You’ll find that riders stop for puncture repairs and to rest.  If you see another rider in obvious difficulty, ask them if they need assistance.
  • Don’t stream riders you don’t know.  Streaming is riding close up behind someone else to benefit from their slipstream and reduce pedalling effort.  This should only be necessary and done by groups of riders who are taking turns whilst in a competitive race.
  • Queue at the start and at junctions.

The end of the race

wiggle medal
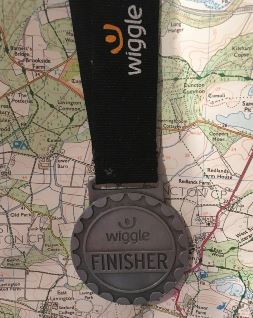
Cycle through the finish line to get your time recorded and be presented with finishing medal (and usually goody bag).

Stop Strava and save the session.  Relax, and congratulations for finishing!   Maybe mutter ‘Never again!’ but weeks later register for your next event.

If you’re calorie counting, add the event’s calorie count to your stats.

Tips

If you think you’re going to get into sportives, waterproof overboots are invaluable, as is a neck warmer for downhill segments.  You only need one puddle to get drenched, and in a long race high speed gets your face and neck cold very quickly.

Take a break from exercise on the following day or two days.

Next Time

All about gyms.  How to find one, what they cost, what you can expect and how you can use them as part of your calorie controlled diet.

Thanks for reading, and if you think this article is useful, please like the page, and choose follow if you’d like to be advised when new blogs are available.  There’s a short registration process with WordPress.


Standard
How to start exercising

How to start exercising – Part 1

Welcome back!

In the last article I described why its a good idea to compliment your dieting with exercise.  In this and following articles I’ll suggest ways that you can do this, most of which are completely free, point you towards mobile apps that’ll help you count your exercise (including Strava and Map My Walk), and explain why this is called the Bank Diet.

Walking

The simplest form of exercise, that requires no lycra (unless you like it a lot), is to go walking.  If you have a dog or a particularly cooperative cat, you may be exercising just by walking them.  If not, then its simply finding somewhere you’ll enjoy walking and going there, and walking.  If you walk to your walk, then that’s even better.

man-s-legs-in-boots-1-1435635-1279x923

I’m fortunate that I have country on my doorstep.  If you aren’t then you might want to visit your local tourist board’s website or simply google ‘best places to walk’ or similar to find a site that will advise on local walks you can do by driving to a start point, parking up and grabbing the walking boots from the back of the car.

A site that I came across that was easy to use is Walking Britain.  You simply add your town and it’ll find walks in your selected radius, e.g.

walking britain example map

Hovering over a red balloon on the map will give you a link which will then allow you to see details about the walk including how to get to it, and information on similar close walks with mileages and links to further information on them.

I know its probably teaching granny to suck eggs – after all what’s difficult about walking!  but, the following may be useful if only as a reminder.

If you’re looking to walk a few miles it pays to take a small backpack with water, the walks instructions, your mobile (charged up of course), some food in case you get hungry, waterproofs and perhaps a jumper in case the weather changes for the worse.  As its winter, its advisable to also carry a torch.  The key thing to remember is that there’s no downside to having more clothes than you need on a walk as you can always  take them off and chuck them in your backpack.  If you’re not a hat wearer and its cold, try to wear one as your head is more sensitive to changes in temperature than most of your body, and without one you’ll feel colder.

If you’ve heard that you lose 90% of heat from your head recent research alleges that this is a myth which began with incorrect US Army training manuals in the 1950’s.

If its pretty cold, take a thermos of tea or coffee.  If you’re walking in the country on exposed tracks, you’re subject to wind chill which will likely make you feel colder faster than you think.

Also, if you’re walking in the country, try to let someone know where you’re going and the time that you expect to be back, in case you run in to difficulties.

If you can find someone to walk with, all the better, as you’ll provide conversation and motivation for each other.   The Ramblers is a charity whose web pages say that their goal is to protect the ability of people to enjoy the sense of freedom and benefits that come from being outdoors on foot.  Their site includes information on local walking groups, which is why I’m including it here.

bottled-water-1324732-639x1808


Drinking

Try to take regular drinks before you feel thirsty.  If you feel thirsty then technically you are already dehydrated and this can disturb your energy levels.

I have read that you only need to be 2% dehydrated to lose 30% of your performance.  How you measure this is another thing.  I try to take a small drink every kilometre and this seems to work.

There’s no harm in taking more water than you need.   Getting thirsty with miles still to go is no fun.

Try to take snack(s) with you as well.  If you’re out for a couple of hours, snacking will keep your metabolism going.  Chocolate is a good snack while walking as it will provide fast energy should you start tiring.


Visibility

If your walk is going to take you into dusk, try to take a torch and some bright or reflective clothing.  You may find yourself on a bridleway used by horses and mountain bike riders.  Mountain bikes can travel at some speed and may not be able to see you until the last moment if you’re completely blacked out.  Torch and reflective clothing also allows you to be seen by motor vehicles for those occasions when you need to take to or cross roads.

If you’re on a road without pavements, it makes sense to walk on the right hand side towards oncoming traffic but try to stay on the outside of corners, crossing the road beforehand if its necessary – traffic will see you a lot quicker.  If you can get hold of a red rear facing light you can clip on the hood of your jacket or backpack, this improves visibility to traffic behind you.    e.g. these lights from Amazon.

If you have a mobile with applications like Map my Walk or similar, then turn it on before you start, and just as important to your calorie control, stop it when you finish.  Nothing worse than finishing a walk, only to discover that you’ve been logging your footsteps around the house for a couple of hours afterwards.

Saying this, if you know what time you set off and finished, you can work out roughly how many calories you used.  Most people walk about 4 kms an hour and this consumes roughly 240 calories, or 60 calories every 15 minutes.

If you don’t use mobile walking apps, try to keep a simple log of how far you’ve walked.  It should show black and white improvement in distance and speed over time.

Walking Apps

There are loads of these and you don’t necessarily have to spend any money to get one.

‘Map my Walk’ is a good example and is downloadable from either the Google App store of Apple’s App Store.

map my walk example screenshots

It shows:

  • Duration
  • Distance
  • Current Pace
  • Average Pace
  • Calories Used

It also gives you an audio description of your stats every kilometre and shows you in map form where you have walked.  The map is useful if you’re not on a circular walk and need to check that you’re returning the way that you went out.  The app will also usefully let you takes photos of your location and let you add a journal entry describing your walk.  You can also see your walk history.

You can pay for premium analytical services which I haven’t yet tried, which give you services including:

  • Live location tracking
  • Interval Training
  • Audio Coaching
  • Heart Rate analysis
  • Routing services (Route Genius)
  • Mobile coaching

Paying means you get an ad free experience, but I haven’t found the free service’s adverts too intrusive.

I use the audio feedback every kilometre as a reminder to drink to prevent dehydration.

After you’ve completed the walk

relax-cat-1187327-640x480

Relax like Mr Tibbs above, have a cup of tea etc and then establish how many calories you’ve burn’t by walking.  When you have the figure, add this to your allowed calories.  You wouldn’t expect to run your car without adding fuel and you’re just the same.  You have to pay (in calories) for that exercise.   The nice bit about the paying in this case is that you get a bunch of calories that you can add back into your diet.  Don’t worry – the diet will still work – you’ve used the energy already and now you’re putting it back.

e..g If you have a calorie limit of 1800, and have walked 4 kilometres, you’d add roughly 240 calories which then gives you a new limit of 2040 calories.  Don’t forget to take off any snacks you’ve consumed while walking.

If you don’t have time to walk

If you don’t have time to get out and walk on an established route somewhere nice, there are other ways you can introduce walking as exercise.  On the way to work, try parking the car further away from work than normal and walk in.  When you arrive, take the stairs instead of the lift.  Go for a walk for half an hour at lunchtime.  Park at the Park and Ride and walk in (as long as its safe to do so).  You’ll be surprised how the calories tot up.

If this isn’t enough, and its too dark to go walking after work, you could join a local gym.  Perfectly good ones only cost around £20 per month, are invaluable when its raining, and have walking machines which give immediate calorie count feedback.

I’ll be going in to more detail on gyms in the next article, speaking of which …

Next Time

This article has introduced the use of walking as a form of exercise.  Next time there’ll be advice on cycling for fitness, detail of a mobile app to help you count the calories while cycling, a beginner’s guide for the use of gyms to keep fit, and how the ‘bank’ part of the bank diet works.

Hope to see you then, and keep up the diet!

All the best. Ian.

Standard