Losing Weight, Slimming Apps

Wee, sleekit, cow’rin, tim’rous beastie

Hi and welcome back.

Even the best laid plans of mice and men are thrown aside sometimes.  My dieting regime had gone a little off balance recently.  Nothing alarming but enough to make me think that my own advice wasn’t working terribly well.

It came about from me just feeling hungrier than normal, and rather than stoically keeping to the calorie count, I gave in to the craving whilst saying “back to good behaviour tomorrow”.   Sometimes you simply can’t resist your body saying “feed me” like raving mad super pot plant Seymour in Little Shop of Horrors.

I avoided the pull of the dark side thanks to my phone.

I had previously written about apps that assist you with dieting, and had briefly mentioned MyNetDiary.  Despite singing its praises, I’ve been diligently writing down my calories in a notebook because I just found it easy.    Why I decided to give MyNetDiary a second chance is anyone’s guess but I figure that it was something that could calm my stroll to larger waist jeans.

I think my biggest objection, (and this may be down to my Scottish ancestry) was that it was free on Android and $4 on the AppStore, but I remembered it had been the best of the apps I’d tried before I returned to simple pencil and paper and downloaded it anyway.

I was surprised to find that it was the push I needed.

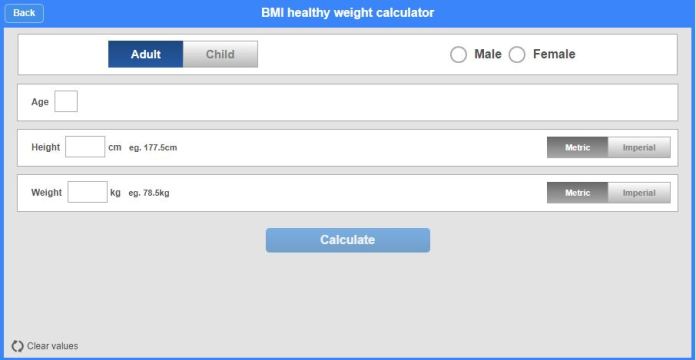
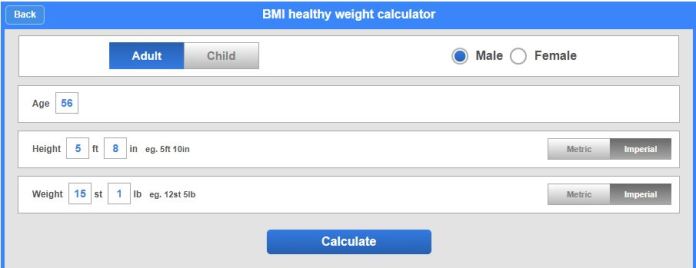
For those of you who’ve never heard of it, its a simple app (it can do a lot more if you start paying for premium services) that shows you your net calorie consumption and remaining balance based on its calculation of a few parameters you supply.

Android Diet Utility 1


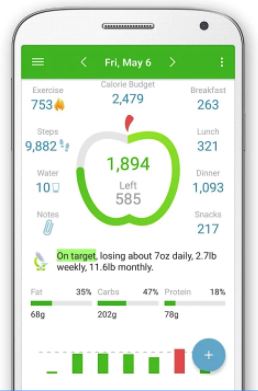
Basically you give it your current weight, height and age and your target weight.  It then establishes the reasonable calorie limit it has computed you need to stick to to get to your target in, in my case a month.   It was 15 calories off of the 1800 value I’ve always successfully used in times I’ve been over the BMI which was was inspiring.

You then select a meal group from Breakfast, Lunch, Dinner and Snacks and then add what you eat.  It handily has a scanner so you can use barcodes to short cut the process, though it can sometimes give you values that are less than a standard serving because of whatever database tables it establishes its version of a serving.  To get around this there’s a custom mode where you can enter anything you want, along with its calorie count.  It also allows you to add detailed data for the food if you have it, while seeming to miss the point that you’re using custom mode because you don’t have these figures to hand, or need to butcher them significantly were you of a mind to supply what for me is way too much information.

The app provides useful feedback about the food / drink you add.  If you click on the > to the right of the Analysis summary on it’s lead screen you get a summary of progress to date (called Bottom line) which explains how far under standard calorie consumption you’re having to manage and the rate it predicts you’re losing weight at.  (All positive news).  Below this there’s a Day highlights section which enthusiastically lists the good points of your performance while not playing up too significantly minor bad points (like including 5 grams of ‘fiber’ – it’s misspelling not mine.

I’ve only been using it a few days, and it has coerced me back towards target, which I definitely wasn’t on a few days and several chocolate bars ago.

I’ve found so far that it’s marvellous if you eat a lot of pre packaged food, where its scanner can (with a few excursions into silliness re servings) and background logic can confidently establish your calorie count.  Where I’ve found its not so easy is when you prepare your own food, for example by making your own sandwiches.

Before the app, I’d reasonably guess the calories dependent on portion size, e.g. 50 grams of Tuna.  With the app, you feel passively persuaded to get this right and enter the right information, which leads to the weighing scales coming out and extra effort (probably using uncounted calories in their own right) has to be expended to obtain the proper figure.   I say passively because the 1 and 0 counting phone app has no idea of anything else aside from its quite clever AI assisted logic.  You could be a pink pelican for all it cares.  That would almost be an advantage because you never see them fussing around with weighing scales.

I also found that the initial enthusiasm of patiently scanning and correcting the program began to give way to a little bit of indifference, when I realised that MyNetApp (as far as I’m aware) is not at all concerned about regular use.  It positively gushes if you enter your weight readings, but doesn’t castigate you, or broadcast your failure to utilise its clever interface to all and sundry on the web if you just ignore it.   I find myself just being lazy with it – it needs you to be diligent and painstaking, and sometimes that’s just not part of my day (unless it comes to my job where I’m being paid to be painstaking).

Despite the fact that at present I feel that I will inexorably be drawn back to pencil and paper, I am sticking with it because without being melodramatic I feel it’s a temporary guiding light to get me back on the path, and when I’m still recovering from injury it’s a help.

It isn’t too heavy on paid services reminders but you find that after a while a little reluctance creeps in to using its links because half of them inevitably lead to billed premium services.  This is fine once you can differentiate between them, but the more you explore the more you encounter these and you do begin to wonder why you had to pay for the app (on iphone at least) when so much of it is only unlocked by an £84 a year subscription (£7 per month).  I don’t pay that to Netflix so the chances I’ll succumb and press the purchase buttons is remote.

Saying this it has enough on board to keep you exploring, including a food check function you can use when buying food which allows you to compare it with similar offerings, the ability to link activity trackers and access to forums used by other people  using the app.

I’m going to use the app for another two weeks and see if my grumblings were excessive or bang on, and compare two other apps with it to see which looks the best value.

If you have observations on your use of this or any other weight loss app I’m sure those looking for help with their slimming regime would be interested, particularly if you’ve found any apps to become erstwhile electronic companions that you’d now be reluctant to part company with.

Bearing in mind this is only part 1 of a two parter, if you think this has been useful please click the like button so more people can see the article.   There may be other useful stuff in my previous blogs that will assist with your diet.

If you’re wondering where the reference to ‘best laid plans of mice and men’ came from, it wasn’t from me, but originates from Robert Burn’s poem ‘To a Mouse’ about a farmer apologising to a mouse for wrecking his home while ploughing, and is the origin of the also much quoted ‘Wee, sleekit, cow’rin, tim’rous beastie’.  Of Mice and Men is also of course the title of the famous novel by Ernest Hemingway.

concept-photo-of-a-rodent-by-healthy-red-apple-1632270-1278x936

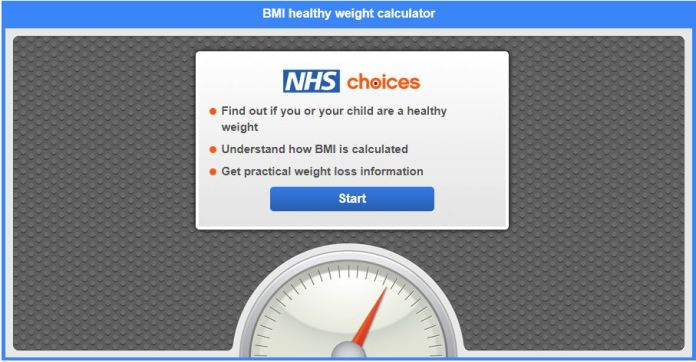
Here’s one for reference.

Last and not least, keep up your dieting – you will make it!

See you in a couple of weeks and hopefully not too many choccy bars.


Standard
Losing Weight, Power Kiting, Stunt Kites

Gone with the Wind

Hi There and welcome back.

On a week when I don’t seem to have made much forward progress on the diet – (and lets face it they sometimes happen),  I thought I’d let you know about a surprising way of exercising that you may not be aware of and might like.

Remember back when you had a kite and mum and dad got you to run up and down to make it stay in the air?

Well this is kind of like that but a little more sophisticated.  This blog and the next one talk about stunt and power kites and how they can help you lose weight.

Just to get one thing out the way for those with twitcher inclinations – we’re not talking about this handsome fella, or the squirrel he’s somewhat curious about:

david-morris-176542

unsplash-logoDavid Morris

You’re probably familiar with holiday kites – they cost about £5, have a distorted diamond shape, a set of strings on each edge and one long string that you fly it with, or more accurately that you stop it disappearing with.

single-line-kite-skylark-1-1473946-639x852

To keep these aloft, you need a strong wind, or to keep walking/running with it.  I remember that after about 20 minutes this loses its appeal.

This is a stunt kite.  These are a little more sophisticated.

kite-2-1411319-1280x960

They cost from £60 and you can do tricks with these – turn them in circles in the sky, get them to fall towards the earth at a great rate of knots and then just before plummeting to the ground pick them up sharply and fire them off back in to the sky again, get them to stall and recover them, and walk dogs – they love chasing them.

They take a surprising amount of effort to hold, and the stronger the wind is, the more effort is needed.  They also take a little while to set up.  Simply put they have two strings connected one on each side of the kite, that are eventually used to control the kite in the air.  That’s right – with this type of kite you are in control, not the kite as is usually the case with the one string type at the top of the page.

Ok, so back to setup.  You have to walk out in to the centre of a large open area (hopefully not with traffic or aircraft landing – a park or the beach would be ideal (and safer).

Once there, you unpack the stunt kite, facing backwards and upside down, connect the strings (they’re actually very high tensile load dyneema these days not string but I won’t get into that) to the kite, and then you put a handy rock or can of coke or something on the kite and walk backwards into wind with the strings until they’re all wound out.

Then you expertly (ok not at first but if you take this up you’ll become expert quite quickly) tug on the lines and the kite will launch into the air, and you’ll be getting upper arm, back and quad exercise whilst pulling back on the kite, just like this fella here.

kite-flyer-1431372-1278x707

That is not the only way you’ve benefited.  You had to walk out to the centre of the field and then walk the strings out – doesn’t sound like much but its walking exercise, and if like I did, you spend half your time walking back to the kite to get it ready to launch again, and then back out again to launch it, you’ll find yourself covering a lot of ground, and while the kites in the air having fun and relaxing too.

two-kites-1484668-1280x960

When you’ve had a few goes, you’ll find there’s something quite marvellous about using the power of nature to transform what was just canvas and poles in a bag, into something quite majestic in the air.

So, the basics are:

  • Buy a stunt kite.
  • Find a safe open area where kite flying is allowed (you’ll see notices if it isn’t).
  • Wait for a reasonably windy, rain free day.
  • Pop out in to the centre of the field with your kite.
  • Assemble it, and put something on it so it won’t blow away (until you want it to).
  • Walk out the lines.
  • Tug on the lines and fly the kite.

There is a little more to it, but not enough to prevent you trying it out, and seeing if you like it.

Please don’t try to fly a kite in weather that looks like it might turn stormy – apart from the risk of getting soaked, its pretty dangerous (kites are earthed lightning conductors in bad weather).

Also if there’s horses about drop your kite – kites spook horses because of their similarity (as far as the horse is determined) to birds of prey.

If you’re not too sure about trying this out on your own, or just want to see how its done first, there are kite flying organisations which hold regular events and will no doubt warmly welcome you along.

In the UK: The Kite Society of Britain
In the USA: American KiteFliers Association

Next time, part two covers kites which will really give you a workout, e.g.

follow-your-kite-1436481-640x960

These have four lines not two, cost from £150, will easily pick you and a board up, happily tow a buggy with you steering at 40 mph, and can do all the tricks of the stunt kite and more.  If you’re using them properly they need safety gear. (Ironically this flyer isn’t using a helmet or armoured jacket – I don’t fly my power kite without them).

Holding one of these things where you want it isn’t easy and uses a lot of calories which is a big plus when you’re dieting and want to have fun.

Hopefully this has whetted your appetite to find out more, and at least try a stunt kite out.

For those who are suppressing yawns and prefer feathered kites, I’m sure you’ll appreciate this fella who would find all this string and canvas very amateur hour, and I wouldn’t blame him:

soar-1361161-1279x803

For a fleeting moment, a few years ago a kite I was flying attracted a bird of prey.  He nobly shared what was probably 20 seconds formating with my kite and then departed for tea.  Not something as a kite flyer you forget easily.

If you’ve found this article interesting please click Like or Follow, and this will be seen by more people.  The lead image is from Enrapture Media on Unsplash .

Thank you for reading and catch you next time.

All the best.  Ian.

Standard
How to recover when the diet slips

A change in direction

Hi and welcome back.

As the title suggests, this blog heralds a change in direction.  I think that I’ve put sufficient information in the articles so far, for anyone to be able to take a fresh look at losing weight, and am reasonably confident that following them will produce results.

They produced results for me, but I have news about this.

My grandfather and uncle fought as pilots in the 1st and 2nd world wars.  They I am sure never took their eyes off the fact that the most dangerous part of their missions was landing, where low on fuel and ammo they could so easily have become cannon fodder for marauding German pilots.

spitfire-1449168-1279x852

This is a Spitfire.  My uncle flew an unarmed mark 16 reconnaissance version in enemy territory towards the end of the 2nd world war.

Much less critical but just as timely is the period when you get to your weight target, and marauding circumstances will lay in wait to throw your best laid plans off course.

I have suffered injury to my knees from, I am pretty sure, and given my age, the change in exercise activity through walking and cycling which has characterised the last eighteen months.  Its made exercise much more difficult and rather made me lower my guard with what I ate, and the pounds have slipped back.  Happily only 9 of them, but after a year and half it makes me feel it is a set back which I don’t currently view positively.

I’ve employed calorie counting and exercise in my weight loss schedule since I started, and now I am having to rely on calorie counting only, at least until I recover from my sports injuries, and predict that it will only be safe to resume them at a more leisurely rate, meaning they won’t be able to assist as much as they have done.

Just like my uncle and Grandfather who saw the unanticipated restart of hostilities with the Germans back in 1939, I am now having to take to battle again (with food) to restore my previous low BMI.  I would never presume to think my calorie counting represents anything like the life threatening challenges faced by my relatives in their flimsy aircraft during a manifestly difficult time, but the metaphor is useful none the less.  Just like I said a few blogs ago, losing track on the diet is not the end of the world and I am confident that I will eventually make the ground up.

The change in direction of this blog will simply be slightly smaller blogs chronicling what I hope will be progress, but which I anticipate will also include some setbacks because I haven’t had to follow my advice without the benefits of exercise.

Hopefully in a couple of months time I’ll be able to announce that I’ve regained the ground I’ve lost.  I hope that narration of my progress will spur me on, and assist anyone else reading who has also faced setbacks.

My objectives are losing the nine pounds and hopefully a little more, by the 6th of March.  My current weight is 12 st 5 lbs and I’m looking to get this back to 11 st 11 lbs or less by losing around 1.5 to 2 pounds a week.  My target today is 1800 calories and I’m still on course, though I’m pretty sure I’ve got to dump a pudding I had hoped for to get in under the line!

Wish me luck, and all the best with your slimming.

Tally Ho! Ian. 😀


Standard
How to start exercising, Sportives

Proof of your accomplishments

Hi and welcome back!

This article shows how to use Strava to measure your cycling activity, how to find cycling clubs and places to cycle, and lastly Sportives – what they are, why you should try them, how you enter and what they’re like to take part in.

Strava

Strava is a GPS based measurement app used to record cycling and running activity, and I wouldn’t think of not using this app when I’m cycling now. The orange themed app is downloadable on Android and at Apple’s App Store.  The following images have kindly been provided by the Strava app on phone or on their site.

Once you’ve installed the app and registered for free, launching it displays your dashboard.

strava dashboard

URL for Strava Dashboard

This is where you can start what they call a feed, to register distance and direction in figures and map display.   This auto pauses if you stop your bike and restarts once you get going again.  You have to stop it though, at which time you can decide whether to sync and save the run.

strava trip 2

Initial Strava screen

Once recorded and synced with your account you can review your miles online at https://www.strava.com/dashboard .

Strava detail 1

Strava Dashboard

Its a lot easier to use and review progress on Strava if you get a mount for it.  I use one from Topeak.

photo of topeak phone mount on stem of racing bike

Topeak Mobile Phone Mount

If you set your phone to permanent display, you’ll have a readout that’s on all the time.  It consumes 30% of battery power over an hour on my iphone – just check that you’re charged up before you mount it, or if you’re out for a while, connect up your battery pack.

Strava allows you to see sections of road on your runs, and your relative performance against other people using Strava who have navigated the same stretch of road, giving you a ranking (mine as you’ll see is miles down the list).

Strava detail 3

It also gives you metrics on height, speed and power during a run, which is useful if you want to see your relative performance on different elevations.

Strava detail 4

There is much more to Strava including a video they send you annually of your achievements throughout the year, and premium contracted services offer a further tier of services for those who take cycling seriously.

Cycling Clubs

The fastest way of finding cycling clubs in your area is  to use the internet.  Three useful sites are Meetup, British Cycling and Cycling UK.

Meetup is an online organising tool for people with similar interests and was founded in 2002 by Scott Heiferman, Matt Meeker and Brendan McGovern as a direct response to the 9/11 attacks, in order to bring people closer together.  You can search for cycling clubs in a radius from a given town, and hotspots to local clubs allow you to see their meetup pages, e.g.

meetup 1

Image kindly provided by Meetup.

British Cycling was mentioned in the last article and besides its wealth of information on cycling in general, it allows you to pinpoint clubs and cycling events near you.

Cycling UK also dedicates part of its site to finding and joining clubs in your area.

Sportives

So you’ve put in all the cycling miles to lose weight.  If you want to have a go at a non competitive race to see how you’d do over a longer distance against the clock, perhaps you’d like to try a sportive? Want some visible proof of your accomplishments? Read on.

I suspect you’re wondering why its a race if it’s not competitive? Technically its not a race but get yourself in amongst hundreds of riders and its difficult to resist the competitive spirit, even if there aren’t prizes or ranking position points which are the requirements for an official competitive race.  They actually contain 2 or 3 separate ‘races’; short routes of around 25 miles, one for 50 miles plus and a longer one of 75  miles plus.

Sportives do allow you to meet other riders, tackle distance you may not have had time to do before, have a ride out with a large number of riders, and provides freebies for entering.  Normally you’re presented with a medal, and free products from companies using the race for marketing.  Sometimes t-shirts, bandanas or socks are given away.  Most sportives cost from £25, depending on distance, and results are displayed after the race on the organiser’s website.  There are normally photographers on the course taking snapshots of every rider which you can buy online a couple of days after the event.

I’ve competed in six sportives throughout the South East in the Wiggle series, but this isn’t the only series.  The text following describes prep and race on one of Wiggle’s runs.

Entry is online, and they’ll add you to their list of riders for the event and send you confirmation of entry details, including route.

Preparation

I prepare the night before as its usually an early start, and if the race is some distance from you you’ll obviously need to take this into account when determining time to set off in the morning.

I usually check the bike over; tyres, drive train, lights etc, and then because I’ve got a small car, remove the wheels and pack the bike so its one less thing to do first thing.

I also check the weather forecast on the BBC to see what it’s sensible wearing first thing.

Packing List

  • Printed entry confirmation and route map.
  • A spare tube or two and rim removal tools.
  • A mini pump.
  • Waterproofs that are small enough that you can carry them with you.  Legs are not as important as upper body so if you’re packing only one take the top.
  • A thermos for coffee/tea. (Race organisers do have catering at the race but its normally a distance from the car park).
  • Headgear.  (This must have a US Snell B90/B95 or European standard CE test label).
  • Portable USB charger (for lights and phone should they run low).
    Water bottle(s).  If you can take two do so.  Better to need water and have it than the other way round.
  • Dry clothing including socks (for when you finish).  (Drive to the event in your race gear).

On the day

Plan to leave contingency time for bad traffic.  You can start the ride after the start time periods (there are different ranges of time for each of the rides) but if you finish the race after the organisers have packed up their marshal stations, you won’t have an official finish time or be able to collect a goodies pack.

When you get closer to the race, you’ll see signposts for car parking.  Once you’ve parked up, leave the bike where it is, pick up your headgear and go and register.  You’ve entered, but the organisers will need to tick you off on their lists and slap a self adhesive transponder sticker with your race number barcode for their tracking mechanisms on your headgear.  If you enter late, you may not be on their list.  If this is the case, go to their ‘on the day’ race entrance table, and they’ll issue your headgear barcode.

With some races, dependent on whether you entered weeks in advance or signed up for particular deals, they’ll also give you whatever you’ve also bought or become eligible for, e.g. water bottles, energy bar packs.

Once you’ve registered, the time is yours to use as you wish before the race, remembering to leave enough time to get your bike assembled, your riding gear on and race number attached.  Organisers usually have bike gear and clothing stalls on site, and there’s catering of some sort if you’ve not had breakfast.

The Race

Join the other riders at the start line, listen to the race safety briefing, set Strava on if you’re using it, and you’re off!

20170408_102038

If its a longer distance than you normally cover, its best to pace at the start, and adjust your speed depending how you feel after a mile or two.  Its not a race but they’ll be riders who are moving at a fair rate to beat personal times (or friends).

Depending on the length of race you’ve selected they’ll be a number of refreshment stations where you’ll get free drink and energy food, and facilities if you need them.

If you’re calorie counting and its food that isn’t packaged, you can note down roughly what calories these are.  If you have a diet app, this makes this easier.  Personally, I figure that its unlikely I’ll break my diet limit as the 30 mile races I enter use about 750 calories, so I don’t usually count on race days.  It does give you a bit more freedom about what you can sensibly eat before and during the race.

Race Etiquette

  • Its normal to overtake on the right and warn people if there trajectory looks like you might collide.
  • If you can, on less busy roads, warn other grouped up riders ahead of you if there’s a car coming.
  • Ride singly where you can.  A fair proportion of the race will be on normal roads.  I find that riders double up on narrow double white line stretches because it forces traffic to overtake sensibly.
  • You’ll find that riders stop for puncture repairs and to rest.  If you see another rider in obvious difficulty, ask them if they need assistance.
  • Don’t stream riders you don’t know.  Streaming is riding close up behind someone else to benefit from their slipstream and reduce pedalling effort.  This should only be necessary and done by groups of riders who are taking turns whilst in a competitive race.
  • Queue at the start and at junctions.

The end of the race

wiggle medal
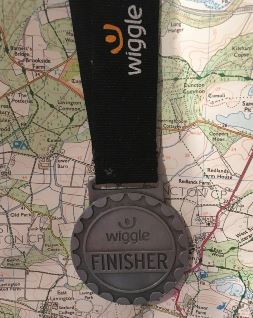
Cycle through the finish line to get your time recorded and be presented with finishing medal (and usually goody bag).

Stop Strava and save the session.  Relax, and congratulations for finishing!   Maybe mutter ‘Never again!’ but weeks later register for your next event.

If you’re calorie counting, add the event’s calorie count to your stats.

Tips

If you think you’re going to get into sportives, waterproof overboots are invaluable, as is a neck warmer for downhill segments.  You only need one puddle to get drenched, and in a long race high speed gets your face and neck cold very quickly.

Take a break from exercise on the following day or two days.

Next Time

All about gyms.  How to find one, what they cost, what you can expect and how you can use them as part of your calorie controlled diet.

Thanks for reading, and if you think this article is useful, please like the page, and choose follow if you’d like to be advised when new blogs are available.  There’s a short registration process with WordPress.


Standard
How to start exercising

How to start exercising Part 2

Welcome back!

In the last article I showed you my take on how you can use walking for exercise, including tips on preparation, how to find where you can walk, mobile apps to assist you and what to do with the calorie count you’ve expended.  This time we’re looking at cycling and what the ‘bank’ in Bank Diet is all about.  I was going to include information on Strava but this is now going to be in the next article.

Cycling

If you want to go a little further with your exercise as part of a calorie controlled diet, cycling will allow this, but how do you start?  Is it simply a case of dusting off the bike and taking to the roads?

cycling-continue-2-1428239-1279x1967

It all depends to start off, with whether you have a bike.  If so, half your decisions are already made for you.

If you have a mountain bike or MTB for general riding, you can do road and forest, though your speed on the road will be compromised because of the weight of the bike.  Saying this, MTBs are not standard and vary greatly on gearing and width and tread of tyres.  Optimum tyres in a forest are wide with a lot of tread, which gives better handling in slippery conditions.

These are not however good for the road because they use greater surface area and slow you down since more of your bike is in contact with the road.

If you have a racing bike, odds are that you are already using it on the road.  If you’re dusting it off, you’ll no doubt already be aware that it is ill fitted to forests because of its gearing, handlebars and thin tyres.

bicyclerace-4-1516167-639x545

If you are lucky enough to own a hybrid bike you can do both forest and road without too many disadvantages, but you’ll miss out the better performance of road or MTB bike in their favoured environments of road and forest respectively.

If you don’t own a bike, how do you go about getting hold of one?

Unless you know the exact specifications of the bike that you need or have enlisted the aid of a bike fitting service, I’d say that you’re better off going to a cycle store as opposed to ordering online.  The cycle store staff will be able to assist in selecting a bike type and size to match your requirements, and if you have problems, you can take the bike back and show them in person what is wrong.

One thing chain stores don’t tell you is that there are specific times of the year when prices dramatically drop.  I am talking by 60%, where they need to clear last season’s stock in anticipation of next year’s bikes.  (Bikes are like the current season’s shirts in premier league – they go out of fashion and sometimes only because they’ve changed the colour or there’s been some equally inconsequential change which fanatics cannot do without).  I bought my Boardman bike for 60% of the standard price and got £100 of free goods as well, so it pays to pick your time.

Also … If you’re buying from Halfords or Chain Reaction Cycles, join British Cycling first!  Their membership card or proof of membership will get you 10% off ALL prices in store, not just cycles and equipment, along with:

  • Liability insurance and legal support (Race Gold, Silver & Ride) for daily cycling
  • Get 10% off purchases at Chain Reaction Cycles
  • Discounted bike insurance
  • Priority access to tickets for major cycling events
  • Save 10% with Direct Debit

Gear

This is down to personal choice of course but I’d recommend that you try to wear light or reflective clothing, or at least a reflective bib.  This may seem overkill but motorists simply don’t see you until the last moment.  Just about the only thing that motorists easily see on their side of the road is a parked car.  I read somewhere that motorcyclists are involved in head on collisions more often than cars because drivers are not looking for something the width of a motorbike, despite bibs and headlight.  From my experience it really isn’t that different for drivers coming up behind a cyclist so the more visibility you can create the better.

If you buy a racing bike, I’d advise that you buy racing bike clothing, both to stop trouser material ending up in the crank, and because it will make you feel more comfortable from the perspective of having breathable material which will cool you down efficiently and because you will look and feel like a race bike rider, which if you don’t use the race bike to commute to the shops and work, is what you now are.

If you’re riding a mountain or Hybrid, and don’t have narrow legging trousers, I’d recommend using a bicycle clip (at least on the right hand side).

Lights


bicycle-lamp-1480863-1280x960

Ok its daylight – what do I need lights for?  The lights aren’t for you to see but for others to see you.  The more high intensity the better.  My front lights put out 150 lumen (measure of the total quantity of visible light) which is about 1/2 of that of a car headlight.  (I have these for forest riding in the evening, and its like daylight).  You don’t have to go to these lengths, but the more costly the lights, usually the higher lumen they are and the better you will be seen.  In daylight use both front and back lights in flashing mode if they have it.  Try to lower the lights so that they aren’t shining directly at opposing direction car drivers.

If you have lights on (flashing during the day) it also means that there’s less chance that opposing drivers will try to overtake a vehicle coming towards you, forcing you in to the side of the road.

What to carry with you

You should carry as a minimum:

  • Water or other drink.

In case of puncture:

  • A pump.
  • A spare tube.  (Its far easier to fit a replacement tube than to try to fix a puncture on the side of the road).
  • Tyre irons or levers. (To prise the cycle tyre off of the rim to let you get to the inner tube.

Optionally:

  • Spare clip lights in case your light’s power source runs out.
    A gas kit.  If you don’t fancy all the pumping (especially to get race bike tyres up to 100 psi).
  • A mobile phone with map app downloaded or an O/S.
  • Chocolate or sweets in case you get really tired.
  • Waterproof jacket and trousers.  (The ones that bundle up to take up no space at all).
  • Either a backpack or a small carry bag on the bike.  I’m not talking a saddlebag here – more small bag which fits below the seat, or a triangle bag which fits below the stem.
  • A small first aid kit.  (it might not be you that needs it).

Road Safety

switch-1543397-1279x852

It is inevitable that you’ll have car drivers pass to close.  Its unlikely that they’re going to hit you but it is unnerving when they get really close.  I’ve found that flashing high visibility rear lights help, but what makes a difference is carrying a camera, e.g. a Go Pro.

If you have a camera, mount it so that it is facing rearward.  Drivers behind can see the red running light and will work out that you have a camera, and are slightly more likely to treat you considerately when passing.  Also, if they have managed to hit you or your bike a forward facing camera won’t pick this up – only what happens afterwards, so your ability to provide corroborating evidence to the Police and insurance companies is compromised.

I actually found by happy accident (when I couldn’t find my Go Pro) that all you need to get passing traffic to give you more room is a camera sticker – similar to the ones you see a few hundred yards before speed cameras.  You don’t need to have a Go Pro on you at the time – the sticker is enough because drivers don’t know you don’t have a camera and they have become conditioned to pay attention when they see the camera sign.  You put the sticker (which you can get off of Amazon or Ebay) on the back of your backpack or jacket).

In the country, if you’re turning a left bend, ride slightly further out in the road than normal.  Following motorists will spot you quicker as they follow you in to the turn.

Be especially careful on dual carriageways.  If you can avoid them do so. Your visibility to fast moving traffic is considerably reduced, especially during the day and at rush hour.

On other roads, if you’re turning right and it looks like you’ll probably have to wait for oncoming traffic, its better to pull over to the left and walk or ride across when traffic is clear from both directions.  You may be in the right as far as the highway code goes, in positioning yourself in the extreme right of your lane, but its dangerous (for you) to stop there and its no consolation if following traffic doesn’t see you in time.  Better to wait until the road’s clear and get to your destination late than not get there.

From my experience the fact that you’re in the middle of the road can exasperate drivers behind you, even though its perfectly legal, even though ordinarily they’d have no second thoughts about flying past you when you’re taking up the same space on the left hand side of the road.

Cleats

If you decide to take up cycling more seriously as a training tool, you might want to invest in a pair of cleat shoes and pedals.  Basically, the shoes and pedals have a connecting apparatus which you click in similar to skies.  They’re really odd to get used to but you get 30% more drive when you’re pedalling so they’re well worth it.  I bought cleat shoes and then fitted full cleats to my racing bike and half cleats to my MTB.  Half cleats have the cleat on one pedal and normal pedal on the other side.  When I was learning to use cleats it gave me flexibility on whether to use cleat shoes or trainers on runs out.   Do remember to disengage at least one foot at traffic lights.  I thankfully haven’t done this but I have seen riders fall over when they forget.

bike-parts-3-1543061-1280x960

One advantage of cleats that I wasn’t aware of is that you can get extra drive off of them when you’re going uphill, by slightly lifting your feet off of the pedals.  You’re still connected, but it concentrates power on the downstrokes.  I haven’t found the technique works on the level or when going downhill.   If you’ve never tried this, have a go – you’ll be amazed at the difference it makes.  If anyone else has come across this I’d be interested to hear what your experience of it was like.

If you’re using cleats on an MTB, and you ride in the forest, you may them difficult to get used to, especially when disconnecting for obstacles and tricky ascents.  I’ve found it was better to preempt these by disconnecting well before, otherwise you’ll be off the bike before you know it, and its all the more agonising when you feel yourself falling and it takes ages, because there’s nothing you can do but look forward to hitting the deck.

Measuring your time on the bike

office-1239230-1279x852

I use Strava to measure distance covered and calories consumed.  It is downloadable on Android and there’s information here on the Iphone equivalent which you can download off of their App Store.

If you don’t have a mobile phone that will allow you to use these apps, an alternative is to count 35 calories for every mile cycled. E.g. An 11 mile cycle will have used (roughly) 385 calories.   Apps like Strava assess calories consumed more accurately because they take advantage of your GPS to give both accurate distance and climb and descent information, for a 2 dimensional perspective.  There’s more in the next article on Strava).

When you’ve finished

relax-1179632-1279x852

Relax, put your feet up, have a cup of tea etc and then establish how many calories you’ve burn’t by cycling.  When you have the figure, add this to your allowed calories.  You wouldn’t expect to run your car without adding fuel and you’re just the same.  You have to pay (in calories) for that exercise.   The nice bit about the paying in this case is that you get a bunch of calories that you can add back into your diet.  Don’t worry – the diet will still work – you’ve used the energy already and now you’re putting it back.

e..g If you have a calorie limit of 1800, and have cycled 10 miles, you’d add roughly 350 calories which then gives you a new limit of 2150 calories.  Don’t forget to take off any snacks you’ve consumed while cycling.

The ‘Bank’ in ‘Bank Diet’

piggy-bank-1-1238373-1278x855

Ok, I called these slimming guidelines ‘The Bank Diet’ because using these techniques, you can add calories from exercise in to your limit, and either consume more calories to cover what you’ve expended, or  bank the calories for the next day.

As an example, say you ride 10 miles which will consume roughly 350 calories.

Now you have a choice, either add the 350 in to your limit, so if your limit is 1800, this would become 2150, or you can take the 350 and add it to tomorrow’s limit.  A third alternative is that you don’t add the calories and consume 350 less calories that day, but I wouldn’t recommend it – I did try this and found that I became hungrier as a result.

As with all banks, you can go overdrawn – say your limit is 1800 and you eat 2000.  You can accommodate this by subtracting the ‘overdraft’ from your following day’s limit, so in this example, this would mean that the following day you eat only 1600 calories.

It really is down to you because everyone’s bodies work differently, but you may find that ‘banking’ will give you more flexibility with your diet.  If you know that you’re not going to be able to calorie count the following day, try banking some calories in preparation – if you can do this off of calories consumed by exercise, this won’t affect your (current) day’s limit.

Next time

What its like to use Strava to measure your cycling activity, how to find cycling clubs and places to cycle, and lastly Sportives – what they are, how you enter and what they’re like to take part in.

If you’ve liked this article please click follow so that you don’t miss out on the next one.

Happy slimming!

Ian.


Standard
Planning Weight Loss

Establishing a sensible weight loss plan

If you’re returning to my blog, welcome back.  If this is your first visit, thank you for taking a look.

Hopefully you have your weight, in either pounds or kilograms.  If not, find it out when you can and follow these instructions.  With this as a starting point, we’re going to put together a safe and just as importantly, realistic schedule for reaching your ideal weight.

Finding out how much weight you have to lose

Ok, the first step is to visit the NHS Choices BMI Healthy Weight Calculator.

This opens like this:

BMI Healthy Weight Calculator

Click the Start button and you’ll be shown this panel:

BMI Healthy Weight Calculator 2

Enter the fairly self explanatory values it asks for.  The buttons at the far right allow you to switch between metric and imperial.  When I used it, I added the following:

BMI Healthy Weight Calculator 3

The Calculate button will take you to a new screen which will ask you to select your assessment of your activity levels.

I chose the following, which was correct at the time:

BMI Healthy Weight Calculator 4

Select the Next button reveals its results .  You can’t close your eyes at this point – remember its going to help whatever it says.

Mine (over a year ago) gave me this result:

BMI Healthy Weight Calculator 5

The slider bar pointer and the orange banner below it show two important things; firstly your BMI, and secondly the calorie intake you should be using to address this.   If you’ve tried some diets, the calorie figures might look higher than you expect.  This surprised me at the time, as the lowest weight I’d ever been as an adult was 14 pounds higher than this, and I remember thinking to myself “That is impossible”.

BMI or Body Mass Index quantifies the amount of tissue mass (muscle, fat, and bone) in an individual, and then categorises that person as underweightnormal weightoverweight, or obese based on that value.

If your BMI pointer is in the yellow or red areas, you probably need to lose weight.  Your eventual target is to reach the green healthy weight band which has a BMI range of 18.5 to 25.  A sensible first target is the yellow zone if you’re not already in it.

Is your result what you expected, or have you been surprised as I was?  I thought about it in terms of bags of sugar – 49 pounds is almost 25 bags of sugar! Can you imagine filling a shopping trolley at the supermarket with that lot and then carrying it around with you?  Because the weight comes off slowly you don’t actually notice the reduction.  The people who do notice are those who haven’t seen you for a while!

I found that the bulk of the work of reducing my weight was dedicated to getting to within a stone of the 25 BMI figure.  Getting to 25 became a part 2 as it were.  If you get to within 14 lbs off of the eventual target, believe me, you’ll already be grinning like a cheshire cat!

old-cat-1399092


Okay, you got me – this isn’t a Cheshire Cat, but you get the idea.  (He could still have come from Cheshire, or like their cheese).

The good news is that getting to the green band is not impossible, and the information I am going to show you will help you do it.  (There isn’t any bad news – at least not here).

Establishing a timetable

Ok, you’re now ready for the next step which is to establish how long this will take you.

Not saying that you’re not great at arithmetic but if you’d like to use it, you may find this easier using Google calculator.

Please write down / add your actual weight.  For me this was 15st 1lb which is 211 lbs.  If you have kilograms instead, that works too.

Then write down/ add your highest healthy weight figure in pounds or kg.  (For me this was 11 st 11 lbs which is 165 lbs) e.g.

BMI Healthy Weight Calculator 5a

Now subtract the second figure from the first, e.g. 211 – 165.  In my case this gave me a difference of 46 lbs (or 3 st 4 lbs).

Now divide the result by 1.5.  This gave me 31.  1.5 is how many pounds you’ll be aiming to lose every week.  31 was the number of weeks it was going to take me to lose the weight if I lost it at this rate. e.g.

Weight        211
Target         165
Difference    46
Divided by   1.5
Equals           31 (weeks)

If you follow the steps above, you should the number of weeks its going to take before you look like a brand new you.  The weeks figure may look like a long time, (it can be made to look better if you convert it to months and remember that instead).  Anyway, time flies, and if you follow my guidelines you’ll soon be looking back and grinning, and wondering why you had never been able to do this before.  (That might be because you hadn’t read the right stuff).

Why 1.5 and not 2 or 3 or 5?

The reason I’ve put 1.5 is that this is achievable.  It may be slower than perhaps you’ve predicted, but it is achievable.

Ever rushed into a diet only to find a few weeks later that the weight is going back on even faster? One of the reasons for this is that the human body doesn’t react well to sudden change.  For instance it can take six months or so before someone emigrating from a hot country to a cold country feels that it isn’t freezing.

Like a tree that bends in a storm and doesn’t break, the more that you can work with your body rather than against it, the more successful you’ll be at losing weight and keeping it off.

palm-tree-1531410

Working with your body and knowing how you can counter its sometimes overkill reaction to what it perceives as an emergency is something that is discussed in the next article.

handwriting-1198736-1279x753

You’ve taken the first step to reducing your weight and improving your health!  Not only by reading this blog this far, but by working out how long it should take you to get to a healthy weight.  Wasn’t too painful was it?

The next article shows you how you can start to do this.  Once again there’s no hidden costs or agenda – I just want to share what I’ve found has helped.

NB: Although this plan is pretty gentle, if you’re at all concerned, speak to your doctor and ask them if they have any reservations against you starting a calorie controlled diet.

Explain that you’re looking to lose a couple of pounds a week and tell them your target.  If they are happy that your body is capable of sustaining this, you’ve got the green light to continue.

OLYMPUS DIGITAL CAMERA

I’d love to hear your feedback (below) whether its good or bad, and if you really like the page please hit the Like button to show you’re impressed.

This blog has shown you how to establish the time it will take you to lose your excess weight and explained why a slow burn approach may work better.  Part 3 explains how to start using the calorie figures and embark on your new lifestyle.  Its not as far fetched as it may sound.  It really can happen, and if I can do it anyone can.

Catch you in part 3.

Best wishes.  Ian.


Standard