

Hi and welcome back to my series of articles showing that it’s not as difficult as you might think to draw a portrait. The header image is from Tim Wright on Unsplash.
This article is stage 4 in my portrait process and is going to show:
- How to complete the mouth.
- How to start on the eyes, ears and hair.
- What blending stumps and tortillions are and how you can use them to improve your pictures
- How to find a local art club (and what you can expect from it).
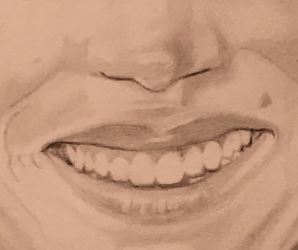
Completing the mouth
This is where we’d got to:

Tidy up any differences in the teeth to the source picture.
Once this is complete, you need to add catch-lights in two areas. One is on the top of the right hand side of the top lip, together with a thin horizontal line below it. To do this use a zero eraser if you have one or use the edge of a standard eraser.
Below this, on the bottom lip, you’re going to remove small vertical strokes to show the vertical catch-lights there.
How to start on the eyes, ears and hair
Eyes
This is where we’d got to last time with the eyes:

This is my rough procedure for this:
- Confirm that the Irises are the correct size and in the right place. You should be able to pull out what you’ve got already and redraw if necessary.
- Reshape the contour of the eyes closer to that in the source photo if its a little out.
- Draw in the Irises and the much darker pupil areas. Be careful when drawing these, and pupils in particular, that you draw in what you see and not what you think should be there.
- Sketch in the contours of the catchlights reflected in the pupils. I think in this case, that these are Studio flood lamps or light from windows.
- Darken the pupil area surrounding the catchlights.
- Draw in the upper and lower eyelid lines and define them further with tone.
- Draw in the main dark eyelash areas and then add the single eyelashes above and below – the lower ones are shorter and fairer.
- Add eyebrows, trying to keep as best you can to the direction and density of the source photo.
- Add catchlights on the top of the bottom eyelid, below the pupil. Draw them in lightly and then pull the pencil inside them out with your eraser.
- Add the darker edges of the Irises. NB: These are not solidly bordered lines on the inside – they feather in to the rest of the iris, so try to represent this, but don’t overdo it.
NB: Adding catch-lights to the eyes is just about impossible using a standard eraser. An electric eraser, similar to the one shown below will allow you to pull out reasonably small areas on the paper.

Used quickly and accurately it will allow you to define the catchlights easily, although it can be a little difficult to control how much area it removes so you may have to shade back in afterwards around the correct size of the catchlight. NB: Be careful you don’t overdo use of the electric eraser because it will easily chew up the paper if applied for too long or too harshly.
An alternative that I once used was to paint the catch-lights in with a dirty shade of white. This gives you full control of the catch-lights but once applied cannot be removed. A purist might argue that this is an unnecessary embellishment and that you should be able to do the catch-lights without resorting to using mixed media. (On the one portrait I used it on, they kind of looked artificial within the sea of pencil).
These are before and after shots of the process described above:


Here you can see there are multiple lines above and below the eye. Above, the first line is the area where the eyelid folds back into as it is opened. The second line below it is a line formed by compression of the eyelid.
The lines below the eye are formed as the skin below the eye similarly compresses as you open your eye. If you want to see how these lines are formed, look in a mirror and (obviously) keeping one eye open, look at the other one as you open and close your eye.
In case you weren’t aware, bags under your eyes are common as you age. With ageing, the tissues around your eyes, including some of the muscles supporting your eyelids, weaken. Then fat that normally helps support the eyes can then move into the lower eyelids, causing the lids to appear puffy. Thanks to the Mayo Clinic for that information by the way. If this interests you, have a look at this BBC article for more information.
Hair
Hair doesn’t have to be defined strand by strand. To understand the impossibility of this, I remember watching a science fiction CGI film called Final Fantasy: The Spirits Within. To reproduce the heroines hair they built a computer model with 60,000 hair strands. It looked superb but can you imagine trying to do this?
Luckily you don’t have to – all you have to do is give the impression of strands.
The first thing you do is use a 2D pencil to darken the hair area. Once you’ve done this, go over it again with an HB pencil. If you have a blending stump use this, or failing that a cotton bud and smooth the pencil that you’ve applied. Warning: Don’t be tempted to smooth the pencil with your fingers. The key reason is that using your fingers transfers oil within your skin on to the paper surface. Once oil is in the paper, it can make drawing on the surface unpredictable and can ruin a picture.
Once you’ve covered the hair surface, look at the source photo and establish which are the brighter areas – a method that helps you to see these is to squint.
Use your eraser and pull out these areas. The images below show before and after doing this:


I’ve gone a stage further with the after image by adding in some of the really dark areas as well.
Ears
To start with, simply outline the ear with a 2B pencil, where it meets the hair. In the source, there’s a block of darker hair beside the ear. Add this in as shown below:


I’ve added a little bit of tone to show the more shaded areas of the ear, but mainly I’ve added the dark area beside it, which makes the ear stand out. NB: There may not be such a stark comparison with every portrait source picture.
Overall
Adding all this up, we’re left with the changes shown below:

Some further changes I’ve added and which aren’t mentioned above are as follows:
- I’ve started drawing some lines going in to the light areas in the hair.
- I’ve added tone in to help define the cheeks, forehead and chin surfaces.
- I’ve darkened the neck area.
- Added a little more detail to the hair components.
- Used a tortillion to smooth the tonal areas – more on that below.
Just in case you were wondering … the portrait is being drawn on white paper, despite what it might look like above, which is how my phone’s camera represents it.
What blending stumps and Tortillions are and how you can use them to improve your pictures
Tortillions are rolls of paper, fashioned to points. Blending stumps look quite similar but are made from tightly spun cotton. You can use them to gently blend pencil so that there’s a smooth transition between pencil and surrounding unmarked paper. They can also be ‘loaded up’ with pencil and used on their own to add tone, rather than drawing it in directly.
These are examples of Tortillions:
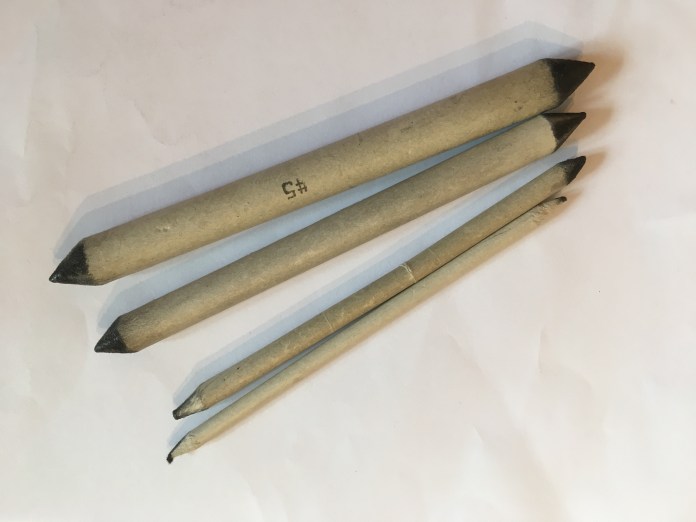
Be careful how you use them – its possible to go over the top and blend everything, which starts to make it look like the person in the portrait has loads of makeup on. Everyone uses these differently but I find that they’re useful for blending in harshly defined areas of tone.
If a tortillion is too heavily loaded with graphite, wipe it off on another piece of paper before using it – its better to under apply than over apply. Use rubbing paper to restore a clean surface, or wipe the end of the stump on clean paper until no marks are made. NB: You can use the point for very focused blending.
I tend to load up one end with graphite for application of new areas of tone and use the other for blending – to save these getting mixed up I wrap an elastic band around the loaded end.
How to find a local art club
Local art clubs advertise in art magazines and local free magazines, and of course can be found on the internet. I just used ‘Local Art Clubs’ and returned loads of sites, an example of which is shown below:

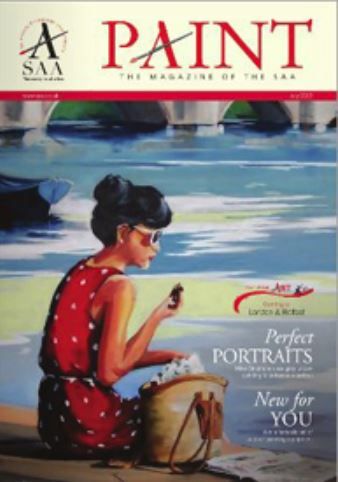
SAA magazine holds a section which details local art clubs and organisations – other art magazines off the shelf hold similar.
Clubs bring together a variety of talents of artists, mainly hobbyists who meet each week to draw their own work in company, and have the opportunity to discuss all things art and chinwag at the same time, or just focus on their pictures and enjoy the company.
They often have demonstration nights by prominent artists, organise shared exhibitions to showcase club member’s work and arrange visits to areas to draw on site or view art collections.
They’ll usually be a subscription which covers hall hire, newsletter stationary etc. Sometimes clubs also charge a modest fee for attendance to cover refreshments and help with hall hire cost.
Some clubs are quiet ones with members focusing on their work and chatting in tea break, or you’ll get some that are more socially focused where you seem to chat half the night at, not necessarily get so much done, but enjoy the experience nevertheless. Its down to personal taste.
Next time …
I hope that this has been helpful, and that the articles are inspiring you to draw your own picture. Next time will be focused on how to:
- Continue the hair
- Draw the shirt in
- Add freckling
- Add further tone and highlighting to the face
- Adding catch-lights to the teeth
- Establish what the background should be
- Use a neat technique to check your picture
It would be great to know how your pictures are turning out. If you have comments, questions etc, or would like to ‘like’ this article or follow it so you don’t miss the next one, you should be able to find buttons on screen to let you do this.
NB: The LIKE and FOLLOW buttons and links are hidden (a bit). If you click the button with the three horizontal lines at the top of the blog, you should then see them.
Thanks for reading this, best of luck with your drawing and I look forward to seeing you next time.
All the best. Ian. 
